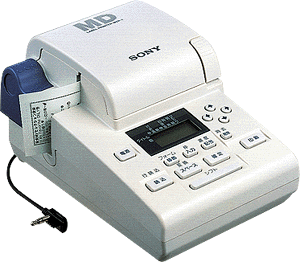
Review of the Sony MZP-1 MD Label Printer
 |
Basic operation of the MZP-1 is straightforward, however its case markings, operation manual and displays are in Japanese, hindering use of its advanced functions by those who do not read the language. After connecting a Sony MD portable* to the machine, a titled disc is inserted and the "read-in" button is pushed. (During loading the MZP-1 sent my MZ-R50 through interesting gyrations, including a visit to "shuffle" mode, but in roughly 60 seconds it had read the contents of a heavily labeled 15 track disc). When read-in completes, the "print" button is pressed and the label type [disc, case, or side] selected with the cursor keys. If you select a label type incompatible with the cartridge, an error is displayed and nothing is printed; clearly Sony has put some effort into avoiding misprints. After confirming the label type, the machine prints out an indelible label on mylar film. A cutter button neatly slices off the label, which can then be peeled from its backing and affixed to the disc. Although the manual states that the labels are for Sony blanks only, they are so thin that they easily conform to any blank's surface. I used them on a variety of discs without problems.
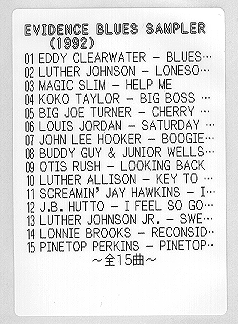 |
Bottom line reads ``15 tracks in all'' |
The unit provides basic titling functions, but the only ones I used were the cursor movement and rubout keys -- necessary for trimming long titles to make everything fit on the label. Character entry is so tortuous, each insertion involving 3 button presses plus a scroll through the alphabet, that titling with a portable seems quick and easy by comparison. The machine has thousands of Kanji characters built in that can be selected by scrolling through tables or by inputting kana sequences and converting them. It will also read Kanji title information from discs (if present), providing you are using it with an MZ-R55,-R50,-E55,-E45,-E44,-E35,-E33, or -E25.
The editing window is an 8 character LCD showing some of the title text, the track number, and several bits of formatting information: the font, font style, bordering and text-wrap modes. Bordering mode prints a frame along the label edge (15 styles are available such as lines, stars, notes, dots, etc.). Though interesting, they reduce the space available for text. Text-wrap mode (the default) causes track titles to wrap lines. If disabled, track titles will be truncated so they fit one per line. The display conveniently shows what text will fit on the label and where lines break, using the special symbols "DE" for end of label and "C" for end of line. Condensed, Gothic text lines are 24 to 25 characters long, and a maximum of 18 track titles fit on a label.
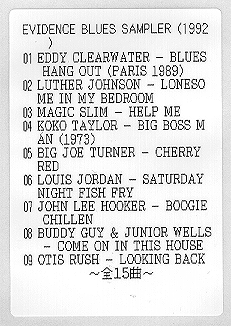 |
titles, here only 9 tracks fit. Note: I title my discs in upper case only. |
The text on the labels I printed was well aligned, but the unit allows fine adjustment of the print position in 31 steps (+/-15) along the wide axis and 16 steps (+/-7) along the narrow axis. In addition, display contrast and print density can be adjusted in 5 steps (+/-2). Oddly, a note in the manual says that changes in print density have little effect with MZP-C1 and MZP-C2 cartridges. Spine labels are printed in pairs, the same text being printed on both. Sony intends that one be used for the disc spine and one for the case spine. The cartridges come in three colors (white, orange and blue) containing 30 labels each (30 pairs of labels in the MZP-C2).
The machine is certainly convenient and useful, but the cost of labeling with it is high. Though it is possible to use the machine's basic print functions without knowledge of Japanese (see below), the ability to read katakana, at least, would considerably improve usability.
I purchased my unit from The Melting Pot, who gave excellent and speedy service. Their prices are $219 for the printer, and $16.50 for the label cartridges (prices include shipping).
| Bordered Label | Case Label (two front labels) |
*The MZP-1 will operate with all Sony portables except the MZ-1, MZ-2P, MZ-F40 and MZ-B3. Note that reading labels with the MZ-R2, -E2, -R3 and -E3 can take several minutes.
Control Panel Layout
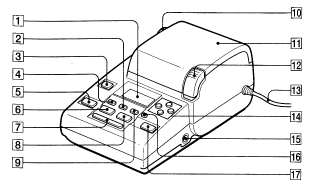
(List shows Unshifted / Shifted functions)
Display Layout
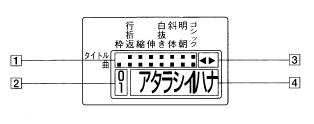
Power on defaults: Gothic font, text-wrap for disc and track titles, condensed disc and track text spacing, disc name in outline style, no label borders.
How to Print Labels without knowing Japanese
To load titles into the machine:To print the titles:
Printing and other partially completed functions may be aborted by pressing "Cancel" at any point.