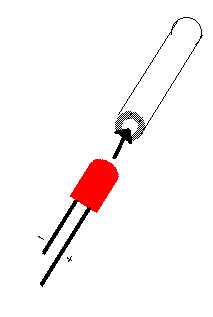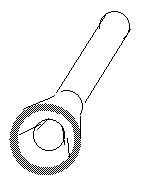
I decided to build my own optical input after seeing the horribly amounts of money my local Sony store was attempting to extort for these devices. I had a CD-ROM with a digital audio output, a few electronic kibbles-n-bits and a few spare hours to play.
| item | quantity |
| Bic Pen Refill | 4cm |
| Red LED (RS: 276-307) | 1 |
| 5minute Epoxy | "not much" |
| Black PVC tape | 1 roll |
| Sharp knife | |
| Toothpicks | |
| Tin Foil | |
| #0 Phillips (+) Screwdriver / Ice Pick | |
| Pliers |
A few people ([one], [two], [three]) have described homebrew TTL-to-optical converters and optical plugs. I had the 7404 for building the buffered LED driver, but I did not have any suitable fibre optic cable for the miniplug. But I had another plan.
Many LEDs are packaged in epoxy resin (or at least thats what the spec sheets say.) This gave me the idea that I could make a plug out of epoxy to act as a waveguide. I've epoxied enough things together that I know that epoxy is transparent and refractive enough to act as a fibre.
The other articles on optical miniplugs suggested the insert from a Bic (or
equivalent disposable) pen be used as the barrel. Indeed, this is what I used,
plus one wrap of black PVC electrician's tape for a spacer. Plug it in to your
jack, and you should see 'DIGITAL NO SIGNAL". The idea is that
this tube will be our optical conduit.

Next thing to do is to cut off about 4cm of the tube. That way you have tube long enough that it will activate the switches, and still be long enough to remove easily when finished recording. Unfortunately the tube is a little too narrow to get a good strong signal, and certainly to narrow to get a good bond with epoxy. Use the ice pick or screwdriver to widen on end of the tube to about twice the original width. That will provide a far better bonding area and will funnel the light properly down the tube.

Next we mix the epoxy. I use foil and toothpicks, since they're disposable. Not much epoxy is needed; we're only filling the tube. After mixing the resin and hardener, I let the glue sit for about 3 minutes. You should notice it's become considerably stickier and viscous; that will keep it from dribbling as much. You'll probably want to hold the tube with pliers, epoxy isn't exactly water-soluble, and it may cause skin irritation if you get some on your hands. By now, the epoxy should have the consistency of thick honey and you should be able to scoop up a small drop and place it into the wide end of the tube. Continue placing small drops in until the tube is full and a small amount of glue is visible at the bottom of the tube. Finally, dip the tip of the LED in the epoxy and place it into the wide end of the tube. Hold the two pieces together vertically for a couple of minutes until the glue sets.

Now that the glue has set, you may wish to wrap the joint and the LED in black tape for strength and to prevent light interference. If necessary, wrap the bottom of the tube with electrical tape to widen it a bit. A thin coat of epoxy may be sufficient, and should be more heat-resistant than tape.You should wait about an hour before using this adapter. That will give the glue time to really solidify so that it doesn't end up messing your recorder.
--
Chris Kuethe: System Administrator - U of A Math Dept

pager: 780.917.6448             office: CAB553, x1704   cell: 903.9475
[email protected]               [email protected]
[email protected]        [email protected]

Opinions expressed herein are solely the responsibility of
the author. And the author wouldn't have it any other way.