![]()
| Monitor audio during recording Even if you set REC MODE to MONO, the monitor signal does not become monaural |
1 Turn on the amplifier and play the program source you want to record. | ||||||||||||||
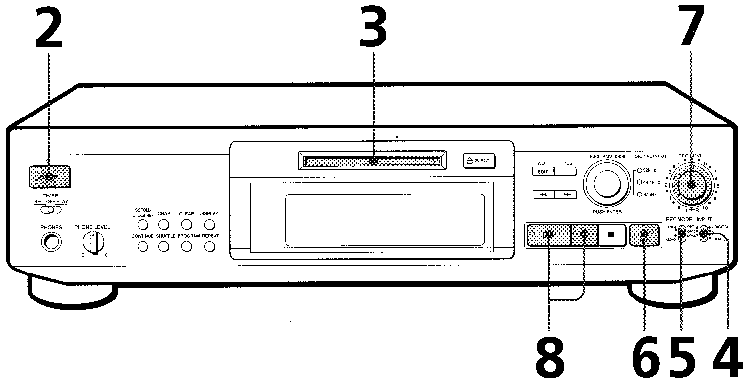
| 2 Press POWER. The POWER indicator changes from red to green. | |||||||||||||||
3 Insert a recordable MD.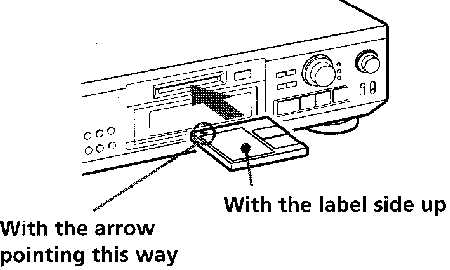 If the MD has a recorded material on it, the deck will automatically start recording from the end of the last recorded track. | |||||||||||||||
4 Set INPUT to the corresponding input connector.
| |||||||||||||||
5 Set REC MODE to the mode you want to record in.
| |||||||||||||||
| When "TOC" flashes in the display The deck is currently updating the Table of Contents (TOC). Do not move the deck or pull out the AC power cord. Changes to an MD made through recording are saved only when you update the TOC by ejecting the MD or changing the deck to standby by pressing POWER. |
6 Press The deck becomes ready to record. | ||||||||||||||
|
7
When recording the analog input signal, adjust the recording level with REC LEVEL. The fourth dot is satisfactory for most purposes. For details, refer to "Adjusting the Recording Level" on page 14. | |||||||||||||||
|
8
Press Recording starts. | |||||||||||||||
|
9
Start playing the program source. Do not disconnect the deck from the power source immediately after recording If you do, recorded material may not be saved to the MD. To save the material, after recording, press :
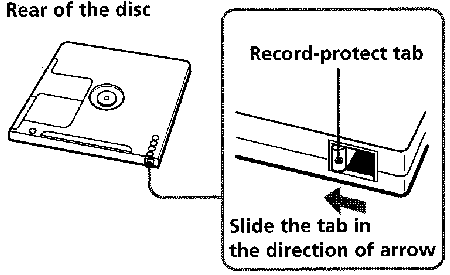
To protect an MD against accidental erasure
Note If you switch REC MODE during recording or recording pause, recording stops. | |||||||||||||||
Table of Contents
HTML-ized by Mario Zlatovic
Next page
Previous page