Inside The Sharp MD-MS200
Duncan Chisholm ([email protected])
[See also Duncan's investigation of the MS200's remote]
 I've
always had an interest in how things work, in fact I don't think I own
a single electronic device that I haven't opened up to see what's inside.
I was a little apprehensive about opening up my new minidisk recorder because
it was such an expensive little piece of equipment (not that that's stopped
me before) and since I ordered it from Japan I had no warranty or any easy
way to have it repaired. Only once has my curiosity about the workings
of electronic devices gotten me into trouble (an unfortunate encounter
with an Autohelm), but I was wary just the same. I was pleasantly
surprised when I finally decided to take my recorder apart. The MS200
is one of the easiest devices to take apart I've seen, and one of the most
rewarding for interesting things to see.
I've
always had an interest in how things work, in fact I don't think I own
a single electronic device that I haven't opened up to see what's inside.
I was a little apprehensive about opening up my new minidisk recorder because
it was such an expensive little piece of equipment (not that that's stopped
me before) and since I ordered it from Japan I had no warranty or any easy
way to have it repaired. Only once has my curiosity about the workings
of electronic devices gotten me into trouble (an unfortunate encounter
with an Autohelm), but I was wary just the same. I was pleasantly
surprised when I finally decided to take my recorder apart. The MS200
is one of the easiest devices to take apart I've seen, and one of the most
rewarding for interesting things to see.
The Pictures
To save you a little download time, I haven't put the pictures directly
on this page but provided links to them instead. If you happen to
have a nice fast internet connection you can view
all the pictures on a separate page. If viewed on a 1024x768
15" display, these pictures are approximately life-size. They're
not the greatest quality since I made them by directly scanning the MS200,
so you may also want to check out some bigger scans of the outside of the
MS200 (also directly scanned) on Conrad
Sanderson's MS200 page.
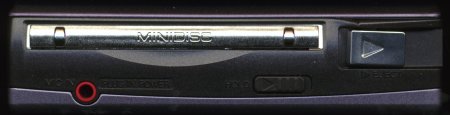
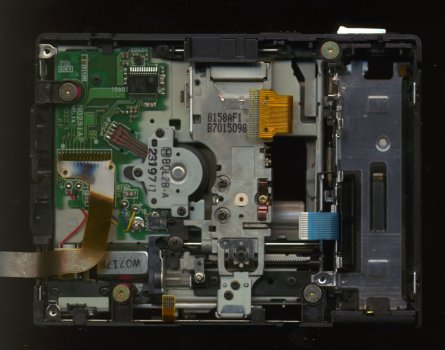
Top Open
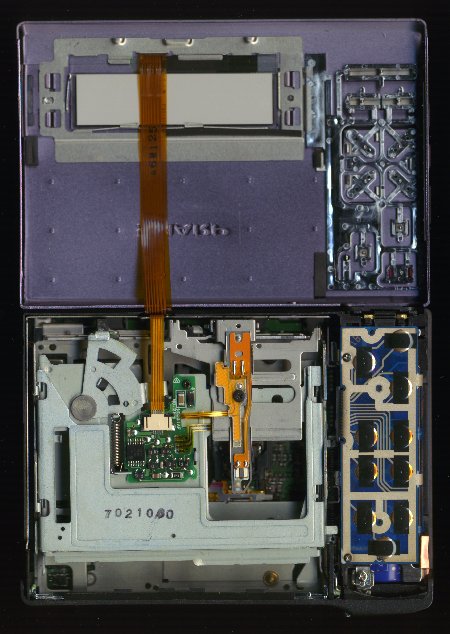
The picture of the open top is the most interesting.
Note the delicate little write head in the middle. Yes, it really
is only held in place by ONE tiny little screw! I don't think it's
alignment is nearly as important as that of the optical head however, since
the laser maintains lateral accuracy (it's only heating a very narrow track),
and the linear accuracy is mostly dependent on how fast the disk is spinning.
I think the write head only has to be roughly aligned with the optical
head so that the magnetic field emitted from it is strong enough at the
point that the laser is heating.
That being said, I still think it looks like a pretty flimsy mount.
The slot-in transport mechanism, on the other hand, looks very sturdy.
It seems to be built as solidly as the ones in minidisk decks that I've
seen. It doesn't look as pretty as the hardware in Sony portables,
but it does look more durable to me, and you don't normally have to look
at it anyway. Of course, the disadvantage of this type of construction
is that it's heavier and takes up more space. The control buttons
look pretty cheesy, but they work well, and would be exceptionally easy
to repair if they ever wear out.
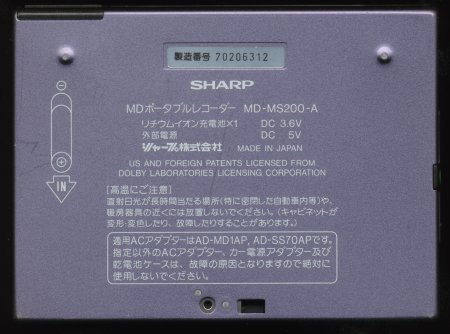
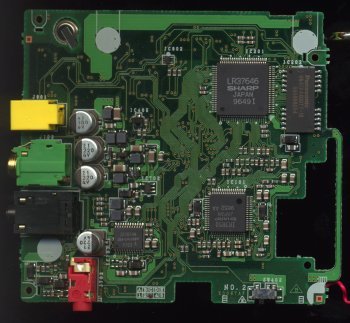
Bottom Open
There's not much to say about the picture of the open
bottom, except to mention one little item that really mystifies me.
I haven't been able to figure out yet why the lead from the positive terminal
of the battery has it's own little sliver of circuit board going around
the hole that's cut out for part of the slot-in mechanism. Was the
board so tightly packed that they couldn't find any room for the power
trace, or did they just forget about it until the last minute? If
the positive end of the battery had to be connected to that specific spot
and there was no room left on the board, why didn't they just use a slightly
longer piece of wire to get it there, instead of that vulnerable-looking
sliver of PCB? I guess a wire might potentially get too close to
the parts of the loading mechanism and have it's insulation worn of.
Opening Up Your MS200
If you're crazy enough to consider trying this out for
yourself, here are a few points to remember:
-
I take no responsibility for any harm that might come to your MS200 as
a result of any of the information presented here - just be careful.
-
I suggest avoiding touching anything when you open the recorder (unless
you're planning to take out the circuit board). Unless you're grounded,
there is a real risk of static discharge damaging the sensitive electronics.
-
Avoid touching the read and write heads or their associated control systems.
I don't think it would take much of a slip to accidentally put these out
of alignment or otherwise damage them.
-
You don't have to remove the battery or open the battery door before removing
the top or bottom covers. (This just makes things a little easier
in some cases.)
-
Use the proper size screwdriver. (Phillips - very small)
-
Don't try to remove the circuit board. I mean it -- it's not worth
all the effort, and you greatly increase the risk of causing serious damage.
If you want to do it anyway despite my warning, follow the following procedure
to make it as painless as possible:
-
Remove the battery.
-
Remove the top cover.
-
Remove the disk ejection lever. This is accomplished by removing
a single screw that is held in place by some sort of glue. Removing
this screw might be the most difficult part of the whole procedure.
-
Remove the bottom cover.
-
You should now be able to easily remove the plastic front face panel -
do this.
-
Replace the top cover (just temporarily - don't put the screws back in)
-
Pull out the two battery contacts. The positive one should simply
pull out, but the negative is held in by a plastic tab near the top of
the player that is released by pushing the metal towards the back of the
player and then pulling up. Confused? It's not too hard to
figure out if you know the [hidden] tab is there.
-
Remove the five ribbon cables. Make sure you pull out the retainer
by the two black tabs on either side of the cable before pulling the cable.
The fully pulled-out retainer position is printed on the board, in case
that's helpfull in any way.
-
Remove the three screws that are holding the board in place.
-
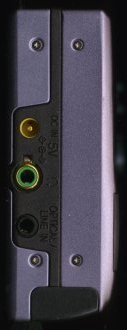
Remove the board by pulling away from the power/headphone/line in jacks
-
Remind yourself again why you went through all that trouble... Why
was that?
Page created and maintained by [email protected]
Last Modified: